
Desserts in a glass is what is preferred at home these days. It limits the amount of dessert that is made and consumed by a small family. Also they look so pretty. Plus, it could be directly served in a glass avoiding more dishes for you to wash 😜.

 Ingredients
For the base
Method
Tips
This strawberry cheesecake was made for our anniversary. I didn't add any gelatin in it for the firm texture as it would be served in a glass and I need not bother about its shape while serving. My lil one was also part of the party so I chose to just avoid using gelatin for him.
IngredientsFor the base
- 7-8 digestive biscuits, crushed
- 1 1/2 tbsp of butter
- A pinch of salt
For the cheese filling
- 1 cup of chilled whipping cream ( before whipping )
- 4 tbsp cream cheese
- 2 tbsp of puréed strawberry
- 4 tbsp of powdered sugar
For the topping
- 8 medium sized strawberries, cut into small cubes
- 2 tbsp of sugar
- A pinch of salt
For the base
- In a food processor, add the crushed biscuits and butter. Pulse it to get a wet sand consistency. If you do not have a food processor, just put the biscuits in a ziploc bag and crush it down using a rolling pin. Remove it into a mixing bowl, and working with your fingers incorporate the butter into them to obtain more like a wet sand texture.
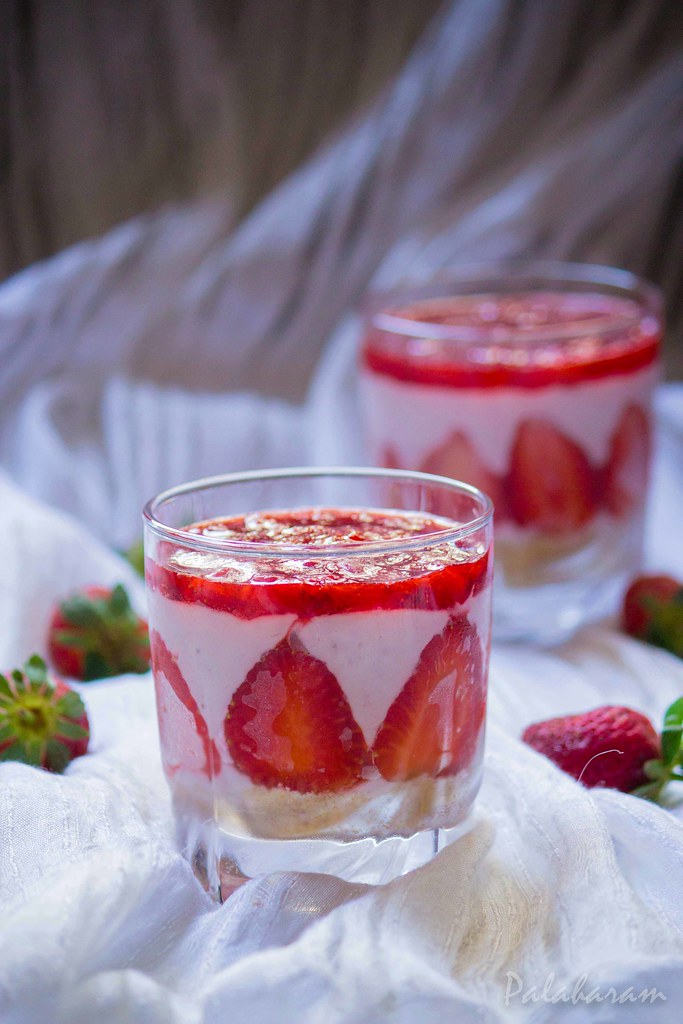
- Take two transparent glasses, spread about 2 tbsp of digestive biscuit mixture at the base of it. Pat it down using a spoon to form a hard base. Refrigerate it for about an hour.
For the filling
- Chill a bowl for about half an hour. To it add the chilled whipping cream and beat it well untill it forms stiff peaks.
- In another bowl, take the cream cheese and puréed strawberry. Whisk it well untill smooth and lump free.
- To it add the whipping cream and fold in everything with a spatula.
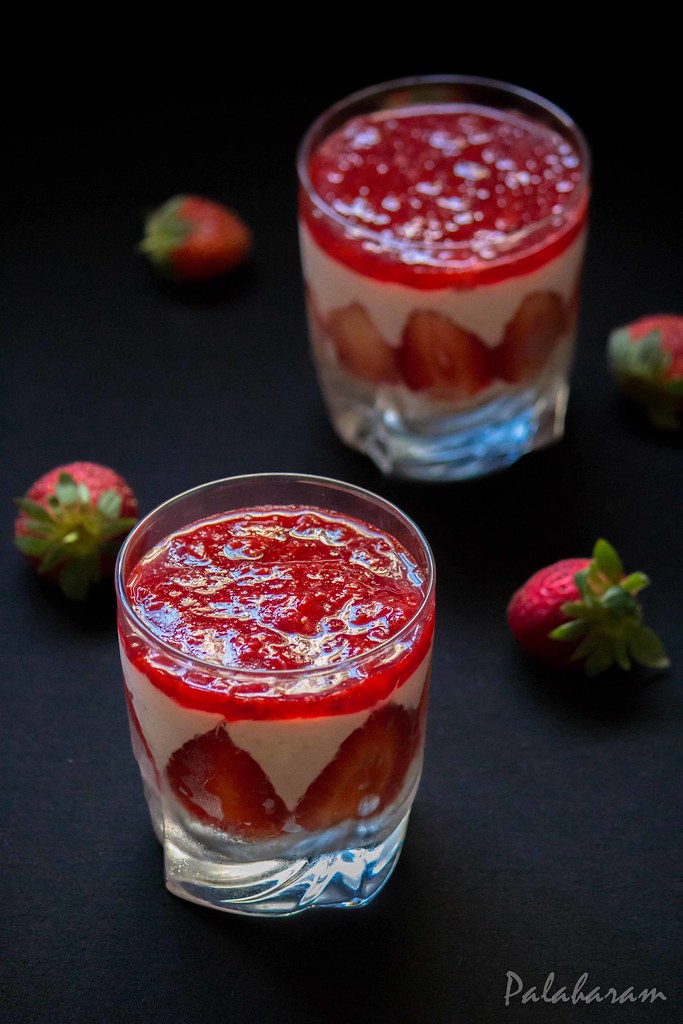
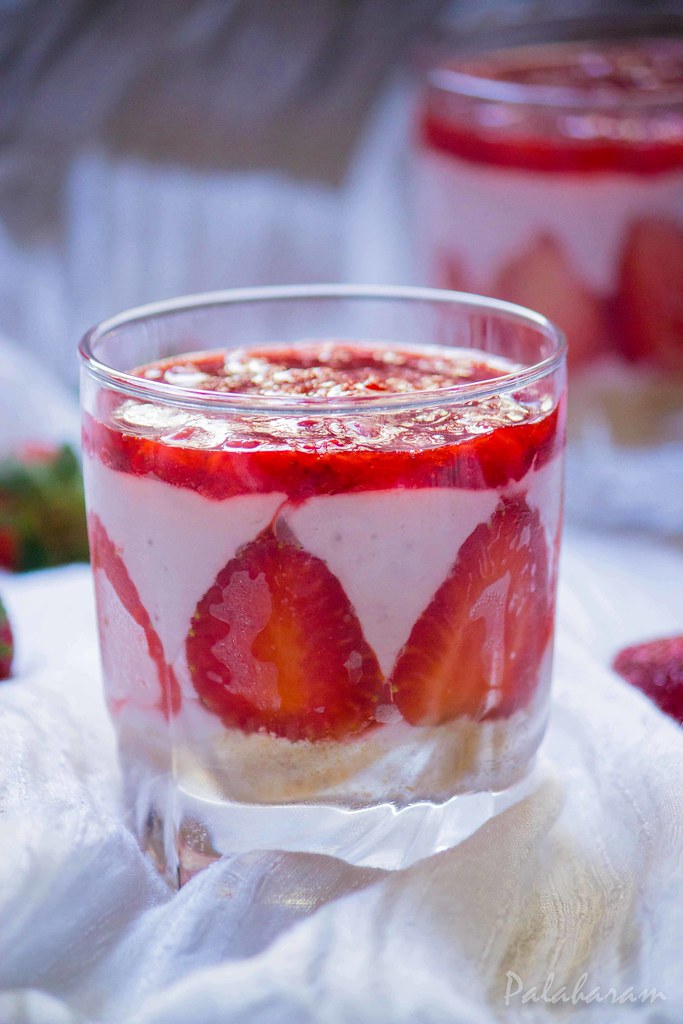
- To the glass with the digestive biscuit base, add a layer of strawberry slices facing the glass walls. Add the cream mixture untill the glass is a bit more than 2/3 filled. Keep it back in the refrigerator and chill it for a minimum of 4 hours.
For the topping
- In a pan, add the cut strawberries, sugar, salt and 1/4 cup of water. Bring it to a boil.
- Turn down the heat to medium -and cook it till the syrup thickens and strawberries get tender and cooked. Remove it into a bowl and let it cool.
- Once cool, refrigerate it for about an hour.
- Remove about 2 tbsp of the prepared syrup in a small blender jars for the filling. Once cooled, blend it well. Remove it into a bowl and refrigerate it for about an hour.
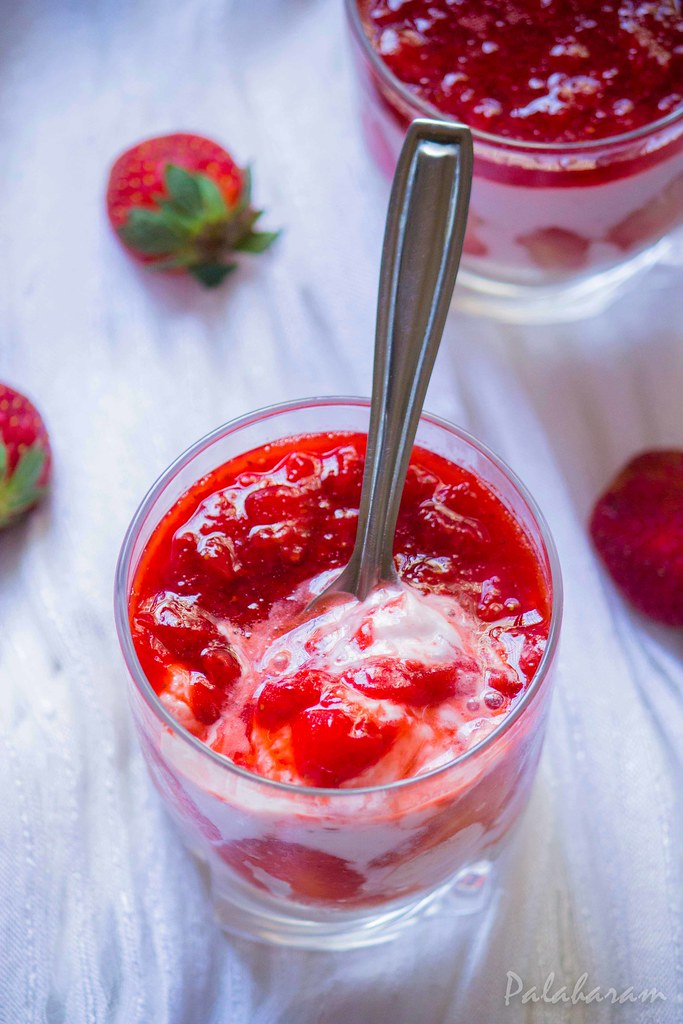
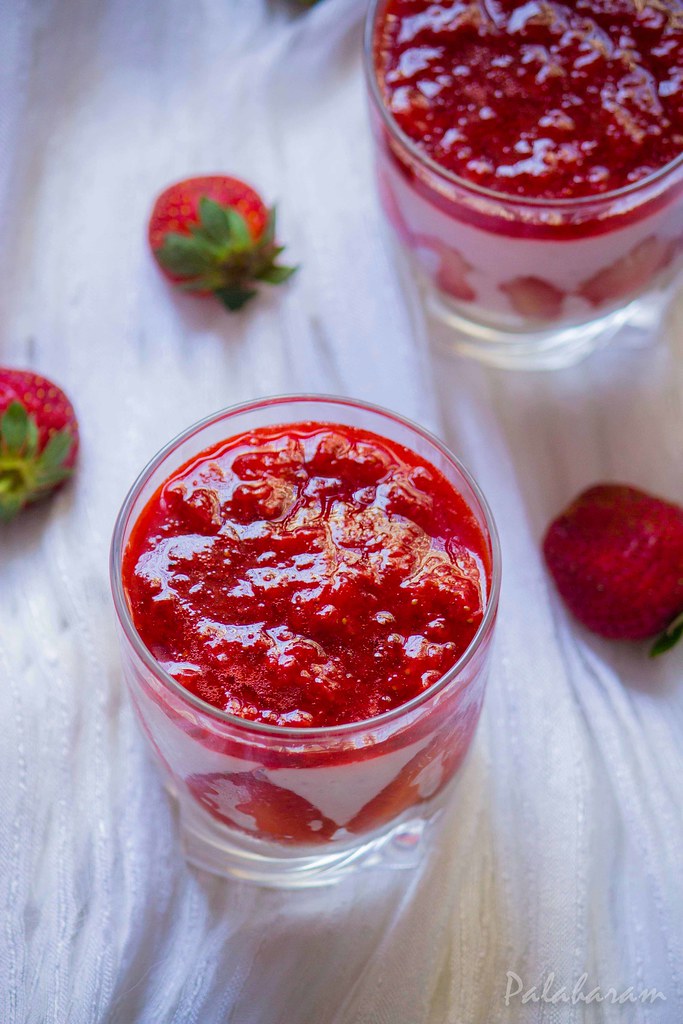
- Spread it on top of the refrigerated glass of cheese mixture to form a layer of it.
- Keep it back in the fridge to chill it for another hour. Serve it chilled.
- You could use the same recipe for the cheese cake in a pan too by adjusting the amount of ingredients. Also, you would need to add gelatin to get a firm texture to the cheesecake when making it in a pan. When made and served in a glass, it's easy to serve and present without adding the gelatin.
- To add the gelatin, soak the gelatin in normal water for about 5 minutes. Double boil it on the stove for about 10-15 minutes or untill the crystals melt. Let it cool. Once cool, add it to the strawberry mixture that would be go into filling as well as into the topping. Once refrigerated it would give the cheesecake a firm texture.

Let me tell you it is done so beautifully!!! Even I prefer such individual desserts for portion control... I am drooling looking at those cups and can imagine your boy must have truly enjoyed this one...
ReplyDeleteLooks superb and so delicious!Tempting clicks:)
ReplyDeleteThat's a good way to control portions:)
ReplyDeleteLoved the jar cheesecakes!
Ahh.. I love the look of the cheese cake.. So easy to make and can make in small quantity and need not bother about too much calories and it is easy to satiate that craving.. Sadly I dont get less qty of whipping cream here so I'm saving this recipe for later use :)
ReplyDelete